
Layouts.md 17 KB
Layouts
Layouts are the central mechanism by which the Input System learns about types of Input Devices and Input Controls. Each layout represents a specific composition of Input Controls. By matching the description of a Device to a layout, the Input System is able to create the correct type of Device and interpret the incoming input data correctly.
Note: Layouts are an advanced, mostly internal feature of the Input System. Knowledge of the layout system is mostly useful if you want to support custom Devices or change the behavior of existing Devices.
A layout describes a memory format for input, and the Input Controls to build in order to read and write data to or from that memory.
The Input System ships with a large set of layouts for common Control types and common Devices. For other Device types, the system automatically generates layouts based on the Device description that the Device's interface reports.
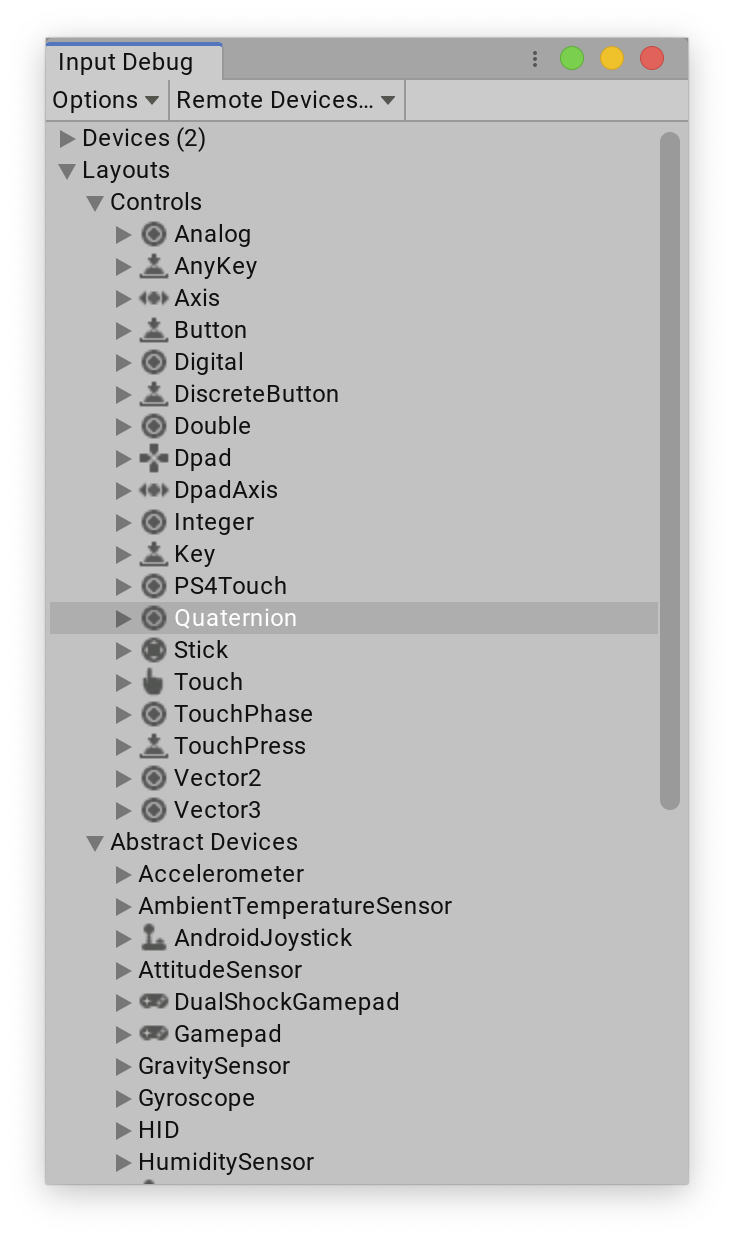
You can browse the set of currently understood layouts from the Input Debugger.
A layout has two primary functions:
- Describe a certain memory layout containing input data.
- Assign names, structure, and meaning to the Controls operating on the data.
A layout can either be for a Control on a Device (for example, Stick), or for a Device itself (that is, anything based on InputDevice).
The Input System only loads layouts when they are needed (usually, when creating a new Device). To manually load a layout, you can use InputSystem.LoadLayout. This returns an InputControlLayout instance, which contains the final, fully merged (that is, containing any information inherited from base layouts and/or affected by layout overrides) structure of the layout.
You can register new layouts through InputSystem.RegisterLayout.
Layout formats
You can add new layouts layouts in one of three ways.
- Represented by C# structs and classes.
- In JSON format.
- Built on the fly at runtime using layout builders.
Layout from type
In its most basic form, a layout can be expressed by a C# class derived from:
InputControlfor a Control layout.InputDevicefor a Device layout.
// The InputControlLayout attribute is not strictly necessary here.
// However, you can use it to set additional properties (such as
// a custom display name for the layout).
[InputControlLayout]
public class MyDevice : InputDevice
{
    public AxisControl axis { get; private set; }
    public ButtonControl button { get; private set; }

    protected override void FinishSetup(InputDeviceBuilder builder)
    {
        base.FinishSetup(builder);

        axis = builder.GetControl<AxisControl>("axis");
        button = builder.GetControl<ButtonControl>("button");
    }
}
You can then register the layout with InputSystem.RegisterLayout. This works the same for Control and for Device layouts.
// Note: This should generally be done from InitializeOnLoad/
// RuntimeInitializeOnLoad code.
InputSystem.RegisterLayout<MyDevice>();
When the layout is instantiated, the system looks at every field and property defined directly in the type to potentially turn it into one or more Control items.
- If the field or property is annotated with
InputControlAttribute, the system applies the attribute's properties to the Control item. Some special defaults apply in this case: - If the field or property has a struct type which implements
IInputStateTypeInfo, the field is considered to be an embedded state struct and the system recurses into the field or property to gather Controls from it. - Otherwise, if the type of the field or property is based on
InputControl, the system adds a Control item similar to case 1, where the member is annotated withInputControlAttribute.
Using a state structure
When you implement support for a new Input Device, there's usually an existing data format in which the Input System receives input for the Device. The easiest way to add support for the data format is to describe it with a C# struct annotated with InputControlAttribute.
public struct MyDeviceState : IInputStateTypeInfo
{
    public FourCC format => new FourCC('M', 'D', 'E', 'V');

    [InputControl(name = "button1", layout = "Button", bit = 0)]
    [InputControl(name = "button2", layout = "Button", bit = 1)]
    [InputControl(name = "dpad", layout = "Dpad", bit = 2, sizeInBits = 4)]
    [InputControl(name = "dpad/up", bit = 2)]
    [InputControl(name = "dpad/down", bit = 3)]
    [InputControl(name = "dpad/left", bit = 4)]
    [InputControl(name = "dpad/right", bit = 5)]
    public int buttons;

    [InputControl(layout = "Stick")]
    public Vector2 stick;

    [InputControl(layout = "Axis")] // Automatically converts from byte to float.
    public byte trigger;
}

// The Device must be directed to the state struct we have created.
[InputControlLayout(stateType = typeof(MyDeviceState)]
public class MyDevice : InputDevice
{
}
Layout from JSON
You can also create a layout from a JSON string that contains the same information. This is mostly useful if you want to be able to store and transfer layout information separate from your code - for instance, if you want to be able to add support for new Devices dynamically without making a new build of your application. You can use InputControlLayout.ToJson() and InputControlLayout.FromJson() to convert layouts to and from the format.
The same layout as above looks like this in JSON format:
{
    "name": "MyDevice",
    "format": "MDEV",
    "controls": [
        {
            "name": "button1",
            "layout": "Button",
            "offset": 0,
            "bit": 0,
        },
        {
            "name": "button2",
            "layout": "Button",
            "offset": 0,
            "bit": 1,
        },
        {
            "name": "dpad",
            "layout": "Dpad",
            "offset": 0,
            "bit": 2,
            "sizeInBits": 4,
        },
        {
            "name": "dpad/up",
            "offset": -1,
            "bit": 2,
        },
        {
            "name": "dpad/down",
            "offset": -1,
            "bit": 3,
        },
        {
            "name": "dpad/left",
            "offset": -1,
            "bit": 4,
        },
        {
            "name": "dpad/right",
            "offset": -1,
            "bit": 5,
        },
        {
            "name": "stick",
            "layout": "Stick",
            "offset": 4,
            "format": "VEC2",
        },
        {
            "name": "trigger",
            "layout": "Axis",
            "offset": 12,
            "format": "BYTE",

        }
    ]
}
Layout builders
Finally, the Input System can also build layouts on the fly in code. This is useful for Device interfaces such as HID that supply descriptive information for each Device.
To build layouts dynamically in code, you can use the InputControlLayout.Builder API.
Here's the same layout from the previous examples constructed programmatically:
var builder = new InputControlLayout.Builder()
    .WithName("MyDevice")
    .WithFormat("MDEV");

builder.AddControl("button1")
    .WithLayout("Button")
    .WithByteOffset(0)
    .WithBitOffset(0);

builder.AddControl("button2")
    .WithLayout("Button")
    .WithByteOffset(0)
    .WithBitOffset(1);

builder.AddControl("dpad")
    .WithLayout("Dpad")
    .WithByteOffset(0)
    .WithBitOffset(2)
    .WithSizeInBits(4);

builder.AddControl("dpad/up")
    .WithByteOffset(-1)
    .WithBitOffset(2);

builder.AddControl("dpad/down")
    .WithByteOffset(-1)
    .WithBitOffset(3);

builder.AddControl("dpad/left")
    .WithByteOffset(-1)
    .WithBitOffset(4);

builder.AddControl("dpad/right")
    .WithByteOffset(-1)
    .WithBitOffset(5);

builder.AddControl("stick")
    .WithLayout("Stick")
    .WithByteOffset(4)
    .WithFormat("VEC2");

builder.AddControl("trigger")
    .WithLayout("Axis")
    .WithByteOffset(12)
    .WithFormat("BYTE");

var layout = builder.Build();
Layout inheritance
You can derive a layout from an existing layout. This process is based on merging the information from the derived layout on top of the information that the base layout contains.
- For layouts defined as types, the base layout is the layout of the base type (if any).
- For layouts defined in JSON, you can specify the base layout in the
extendsproperty of the root node. - For layouts created in code using
InputControlLayout.Builder, you can specify a base layout usingInputControlLayout.Builder.Extend().
Control items
Each layout is comprised of zero or more Control items. Each item either describes a new Control, or modifies the properties of an existing Control. The latter can also reach down into the hierarchy and modify properties of a Control added implicitly as a child by another item.
    // Add a dpad Control.
    [InputControl(layout = "Dpad")]
    // And now modify the properties of the "up" Control that was added by the
    // "Dpad" layout above.
    [InputControl(name = "dpad/up", displayName = "DPADUP")]
    public int buttons;
The following table details the properties that a Control item can have. These can be set as properties on InputControlAttribute, as properties on the Control in JSON, or through methods on InputControlLayout.Builder.ControlBuilder.
| Property | Description |
|---|---|
name |
Name of the Control. By default, this is the name of the field/property that InputControlAttribute is applied to. |
displayName |
Display name of the Control (for use in UI strings). |
shortDisplayName |
Short display name of the Control (for use in UI strings). |
layout |
Layout to use for the Control. |
variants |
Variants of the Control. |
aliases |
Aliases for the Control. These are alternative names the Control can be referred by. |
usages |
Usages of the Control. |
offset |
The byte offset at which the state for the Control is found. |
bit |
The bit offset at which the state of the Control is found within its byte. |
sizeInBits |
The total size of the Control's state, in bits. |
arraySize |
If this is set to a non-zero value, the system will create an array of Controls of this size. |
parameters |
Any parameters to be passed to the Control. The system will apply these to any fields the Control type might have, such as AxisControl.scaleFactor. |
processors |
Processors to apply to the Control. |
noisy |
Whether the Control is to be considered noisy. |
synthetic |
Whether the Control is to be considered synthetic. |
defaultState |
Default initial value of the state memory Control. |
useStateFrom |
For synthetic Controls, used to synthesize Control state. |
minValue |
The minimum value the Control can report. Used for evaluating Control magnitude. |
maxValue |
The maximum value the Control can report. Used for evaluating Control magnitude. |
Layout overrides
You can non-destructively change aspects of an existing layout using layout overrides. You can call InputSystem.RegisterLayoutOverride to register a layout as an override of its base layout. The system then adds any property present in the override to the base layout or to existing properties.
// Add an extra Control to the "Mouse" layout
const string json = @"
    {
        ""name"" : ""Overrides"",
        ""extend"" : ""Mouse"",
        ""controls"" : [
            { ""name"" : ""extraControl"", ""layout"" : ""Button"" }
        ]
    }
";

InputSystem.RegisterLayoutOverride(json);