
workflow-create-playmode-test.md 2.3 KB
Workflow: How to create a Play Mode test
To create a Play Mode test, you can follow a similar process as when you want to create an Edit Mode test.
- Start with switching to the PlayMode tab in the Test Runner window.
- Create a test assembly folder (see How to create a new test assembly). The folder name is Tests by default (or Tests 1, Tests 2, etc. if the preceding name is already in use).
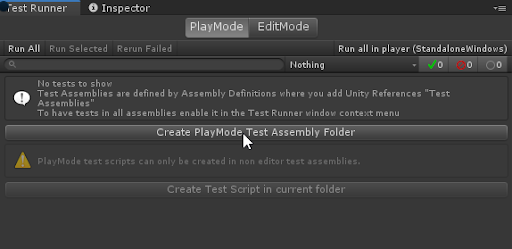
Note: If you don’t see the Create Play Mode Test Assembly Folder button enabled, make sure that in the Project window you navigate out of a folder with another .asmdef (such as one for Edit Mode tests).
- When you have your Play Mode test assembly folder ready, then create your Play Mode test.
Note: Pre-defined Unity assemblies (such as Assembly-CSharp.dll) do not reference your new assembly.
References and builds
Unity Test Framework adds a reference to TestAssemblies in the Assembly Definition file, but it won't include any other references (e.g., to other scripting assemblies within the Unity project). So you need to add other assemblies yourself if you want to test them too.
Unity does not include TestAssemblies in Player builds, but in the Test Runner window, we have such an option. If you need to test code in pre-defined assemblies, you can reference TestAssemblies from other assemblies. You must remove these tests after the test run so that Unity does not add them to the final Player build.
To do this, in the Test Runner window choose Enable playmode tests for all assemblies option from the drop-down menu (to expand, click on the small list item in the top right corner). In the dialog box, click OK to manually restart the Editor.
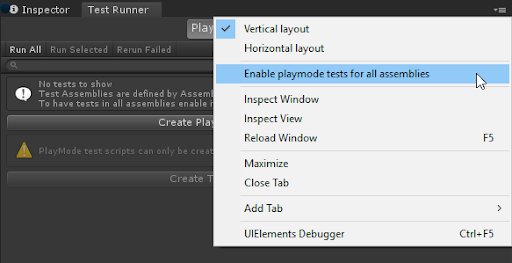
Note: Enabling Play Mode tests for all assemblies includes additional assemblies in your project build, which can increase the project’s size as well as the build time.
For more information, see Edit Mode vs. Play Mode tests.